
| 일 | 월 | 화 | 수 | 목 | 금 | 토 |
|---|---|---|---|---|---|---|
| 1 | 2 | 3 | 4 | 5 | 6 | 7 |
| 8 | 9 | 10 | 11 | 12 | 13 | 14 |
| 15 | 16 | 17 | 18 | 19 | 20 | 21 |
| 22 | 23 | 24 | 25 | 26 | 27 | 28 |
| 29 | 30 |
- IT자격증
- Java
- AI
- 리눅스자격증
- 정처기실기
- 리눅스마스터2급2차
- 리눅스마스터
- SW
- Django
- C
- 공부블로그
- 장고
- python
- 프로그래밍
- 리눅스마스터2급
- Linux
- 코딩
- 리눅스명령어
- 정보처리기사
- 리눅스활용
- 자격증
- 정보처리기사실기
- 리눅스
- 웹개발
- 정처기기출
- 머신러닝
- 기사자격증
- 정보처리기사기출
- 정처기
- IT
- Today
- Total
Tech Trail
[Error] Flutter Widget Test: 예외 해결과정 본문
Flutter로 개발을 진행하면서 Widget Test를 수행하던 중 예외가 발생하여 그 해결 과정을 공유합니다.
특히, 테스트가 실패하고 있는 이슈를 디버깅하는 방법과 Gradle 관련 문제, 그리고 VSCode의 확장 기능에 대한 추가적인 설정 등을 다뤄보겠습니다.
// This is a basic Flutter widget test.
//
// To perform an interaction with a widget in your test, use the WidgetTester
// utility in the flutter_test package. For example, you can send tap and scroll
// gestures. You can also use WidgetTester to find child widgets in the widget
// tree, read text, and verify that the values of widget properties are correct.

import 'package:flutter/material.dart';
import 'package:flutter_test/flutter_test.dart';

import 'package:quiz_app_test/main.dart';

void main() {
  testWidgets('Counter increments smoke test', (WidgetTester tester) async {
    // Build our app and trigger a frame.
    await tester.pumpWidget(MyApp());

    // Verify that our counter starts at 0.
    expect(find.text('0'), findsOneWidget);
    expect(find.text('1'), findsNothing);

    // Tap the '+' icon and trigger a frame.
    await tester.tap(find.byIcon(Icons.add));
    await tester.pump();

    // Verify that our counter has incremented.
    expect(find.text('0'), findsNothing);
    expect(find.text('1'), findsOneWidget);
  });
}
위 코드는 widget_test.dart 파일의 전체 코드입니다.
디버깅을 했더니 아래와 같은 예외가 발생했습니다.
Exception has occurred.
TestFailure (Expected: exactly one matching candidate
Actual: _TextWidgetFinder:<Found 0 widgets with text "0": []>
Which: means none were found but one was expected )
예외 메시지를 살펴보면 테스트가 실패하고 있는데, 기대한 대로 '0' 텍스트를 찾지 못했다는 것을 알 수 있습니다.
가장 가능성 있는 이유는 MyApp 위젯이 기대한대로 초기화되지 않았거나, 특히 초기 상태가 예상과 다르게 설정되어 있을 수 있습니다. 즉, 가장 먼저 확인해야 할 것은 MyApp 위젯이 어떻게 구성되어 있는지입니다.
1. MyApp 초기 상태 확인
앱의 기본 구조와 초기 상태를 설정하는 main.dart 파일을 살펴보겠습니다.
import 'package:flutter/material.dart';
import 'package:quiz_app_test/screen/screen_home.dart';

void main() => runApp(MyApp());

class MyApp extends StatelessWidget {
  @override
  Widget build(BuildContext context) {
    return MaterialApp(
      title: 'My Quiz App',
      home: HomeScreen(),
    );
  }
}
위 코드는 main.dart 파일의 전체 코드이고요.
main.dart 파일에서 MyApp이 HomeScreen 위젯을 홈으로 하는 MaterialApp을 생성하고 있습니다.
이제 HomeScreen에서 초기에 보이는 텍스트를 확인해야 합니다.
2. HomeScreen 초기 상태 수정
import 'package:flutter/material.dart';

class HomeScreen extends StatefulWidget {
  @override
  _HomeScreenState createState() => _HomeScreenState();
}

class _HomeScreenState extends State<HomeScreen> {
  @override
  Widget build(BuildContext context) {
    Size screenSize = MediaQuery.of(context).size;
    double width = screenSize.width;
    double height = screenSize.height;

    return SafeArea(
      child: Scaffold(
        appBar: AppBar(
          title: Text('My Quiz APP'),
          backgroundColor: Colors.deepPurple,
          leading: Container(),
        ),
        body: Column(
          mainAxisAlignment: MainAxisAlignment.center,
          crossAxisAlignment: CrossAxisAlignment.center,
          children: <Widget>[
            Center(
              child: Image.asset(
                'images/quiz.jpeg',
                width: width * 0.8,
              ),
            ),
          ],
        ),
      ),
    );
  }
}
위 코드는 screen_home.dart 파일의 전체 코드입니다.
HomeScreen 위젯이 AppBar와 이미지를 포함한 간단한 화면을 구성하고 있습니다.
그러나 위의 코드에서는 counter나 FloatingActionButton과 같은 상태를 관리하는 부분이 누락되어 있습니다.
그래서 테스트에서 예상한 텍스트 '0'과 '1'을 찾지 못하는 문제가 발생할 수 있습니다.
따라서 counter 변수를 추가하고, FloatingActionButton을 통해 counter 값을 증가시킬 수 있도록 코드를 수정해보겠습니다.
import 'package:flutter/material.dart';

class HomeScreen extends StatefulWidget {
  @override
  _HomeScreenState createState() => _HomeScreenState();
}

class _HomeScreenState extends State<HomeScreen> {
  int counter = 0;

  @override
  Widget build(BuildContext context) {
    Size screenSize = MediaQuery.of(context).size;
    double width = screenSize.width;

    return SafeArea(
      child: Scaffold(
        appBar: AppBar(
          title: Text('My Quiz APP'),
          backgroundColor: Colors.deepPurple,
          leading: Container(),
        ),
        body: Column(
          mainAxisAlignment: MainAxisAlignment.center,
          crossAxisAlignment: CrossAxisAlignment.center,
          children: <Widget>[
            Center(
              child: Image.asset(
                'images/quiz.jpeg',
                width: width * 0.8,
              ),
            ),
            SizedBox(height: 16.0),
            Text(
              'Counter: $counter',
              style: TextStyle(fontSize: 18.0),
            ),
          ],
        ),
        floatingActionButton: FloatingActionButton(
          onPressed: () {
            setState(() {
              counter++;
            });
          },
          child: Icon(Icons.add),
        ),
      ),
    );
  }
}
screen_home.dart 파일의 수정된 코드는 위와 같습니다.
// This is a basic Flutter widget test.
//
// To perform an interaction with a widget in your test, use the WidgetTester
// utility in the flutter_test package. For example, you can send tap and scroll
// gestures. You can also use WidgetTester to find child widgets in the widget
// tree, read text, and verify that the values of widget properties are correct.

import 'package:flutter/material.dart';
import 'package:flutter_test/flutter_test.dart';
import 'package:quiz_app_test/main.dart';

void main() {
  testWidgets('Counter increments smoke test', (WidgetTester tester) async {
    // Build our app and trigger a frame.
    await tester.pumpWidget(MyApp());

    // Verify that our counter starts at 0.
    expect(find.text('0'), findsOneWidget);
    expect(find.text('1'), findsNothing);

    // Tap the '+' icon and trigger a frame.
    await tester.tap(find.byIcon(Icons.add));
    await tester.pump();

    // Verify that our counter has incremented.
    expect(find.text('0'), findsNothing);
    expect(find.text('1'), findsOneWidget);
  });
}
참고: widget_test.dart 파일의 전체 코드
flutter run
를 실행해주니까
응 ~ 또 에러 ~
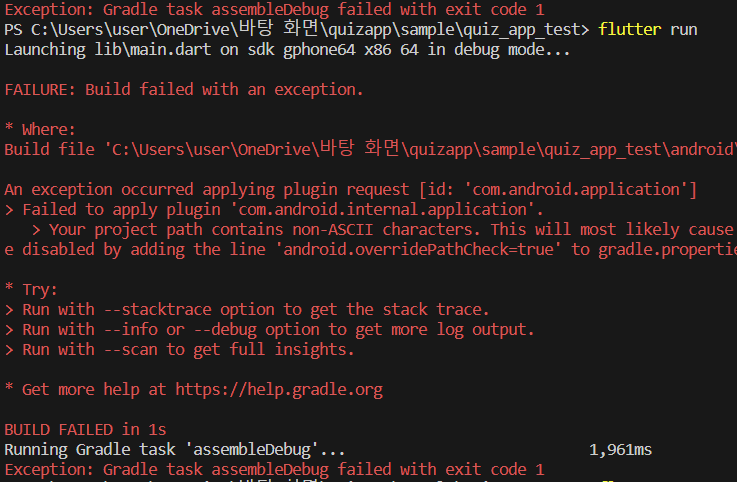
PS C:\Users\user\OneDrive\바탕 화면\quizapp\sample\quiz_app_test> flutter run Launching lib\main.dart on sdk gphone64 x86 64 in debug mode... FAILURE: Build failed with an exception. * Where: Build file 'C:\Users\user\OneDrive\바탕 화면\quizapp\sample\quiz_app_test\android\app\build.gradle' line: 2 * What went wrong: An exception occurred applying plugin request [id: 'com.android.application'] > Failed to apply plugin 'com.android.internal.application'. > Your project path contains non-ASCII characters. This will most likely cause the build to fail on Windows. Please move your project to a different directory. See http://b.android.com/95744 for details. This warning can be disabled by adding the line 'android.overridePathCheck=true' to gradle.properties file in the project directory. * Try: > Run with --stacktrace option to get the stack trace. > Run with --info or --debug option to get more log output. > Run with --scan to get full insights. * Get more help at https://help.gradle.org BUILD FAILED in 1s Running Gradle task 'assembleDebug'... 2,031ms Exception: Gradle task assembleDebug failed with exit code 1
이 오류는 안드로이드 Gradle 빌드 도구에서 프로젝트 경로에 ASCII 이외의 문자가 포함되어 있어 발생하는 문제로 보입니다. 안드로이드 Gradle 플러그인은 프로젝트 경로에 ASCII 이외의 문자가 포함되어 있으면 빌드에 실패할 수 있습니다.
3. Gradle 관련 문제 해결
android/gradle.properties 파일에 다음과 같은 라인을 추가하여 경로 확인을 비활성화할 수 있습니다.
android.overridePathCheck=true
추가 후에 디버깅을 했더니
You don't have an extension for debugging Propertis. Should we find a Properties extension in the Marketplace?
"Properties" 또는 "Gradle"과 관련된 확장 프로그램 기능이 설치되어 있지 않나보네요.
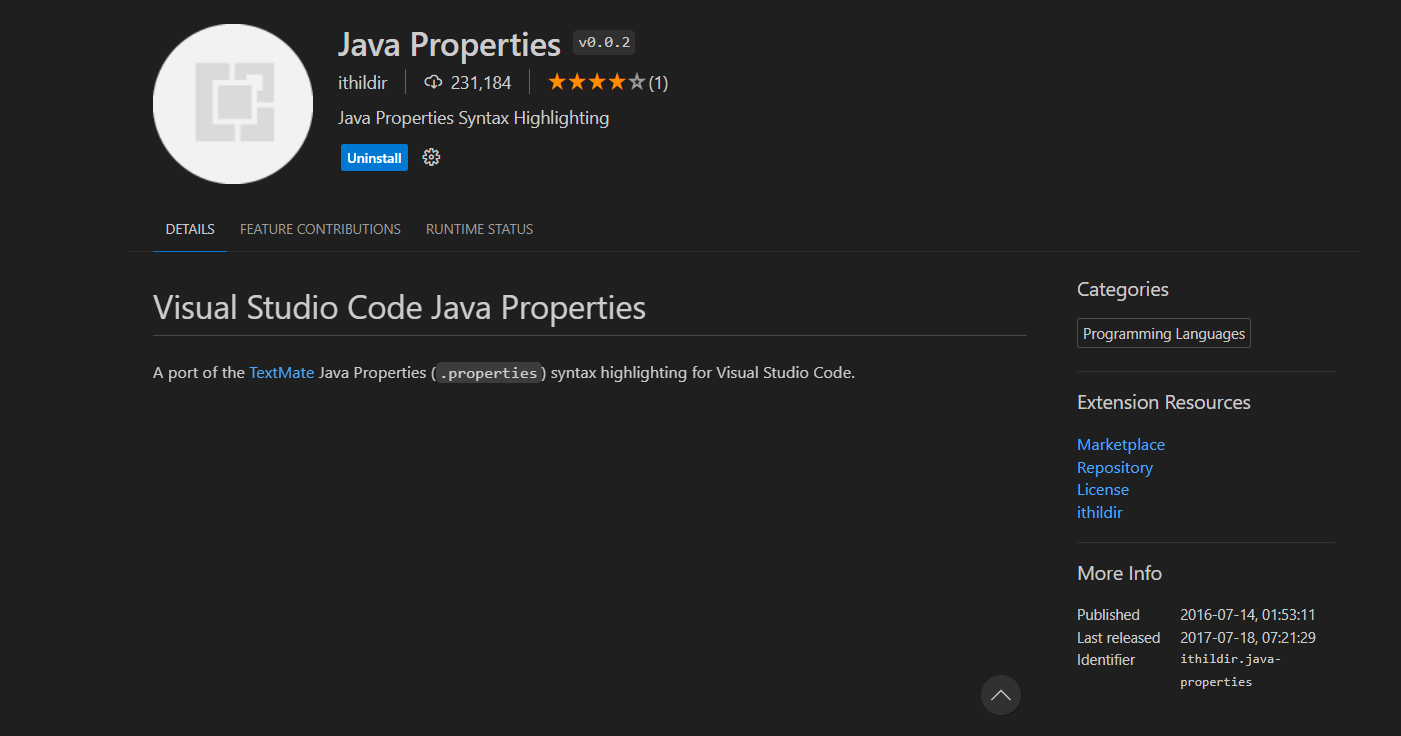
4. VSCode에서 Properties 확장 기능 설치
- 사이드바의 Extensions(확장 프로그램) 아이콘을 클릭합니다. (아니면 Ctrl+Shift+X를 누릅니다.)
- 검색 창에 "Properties"를 입력하거나 "Gradle"과 관련된 확장을 찾아봅니다.
- 검색 결과에서 적절한 확장을 찾아 설치합니다.
"Java Properties"라는 확장이 Java와 Gradle 프로젝트의 속성 파일을 지원하는데 도움을 줄 수 있습니다.
다시 "flutter run" 실행을 하면
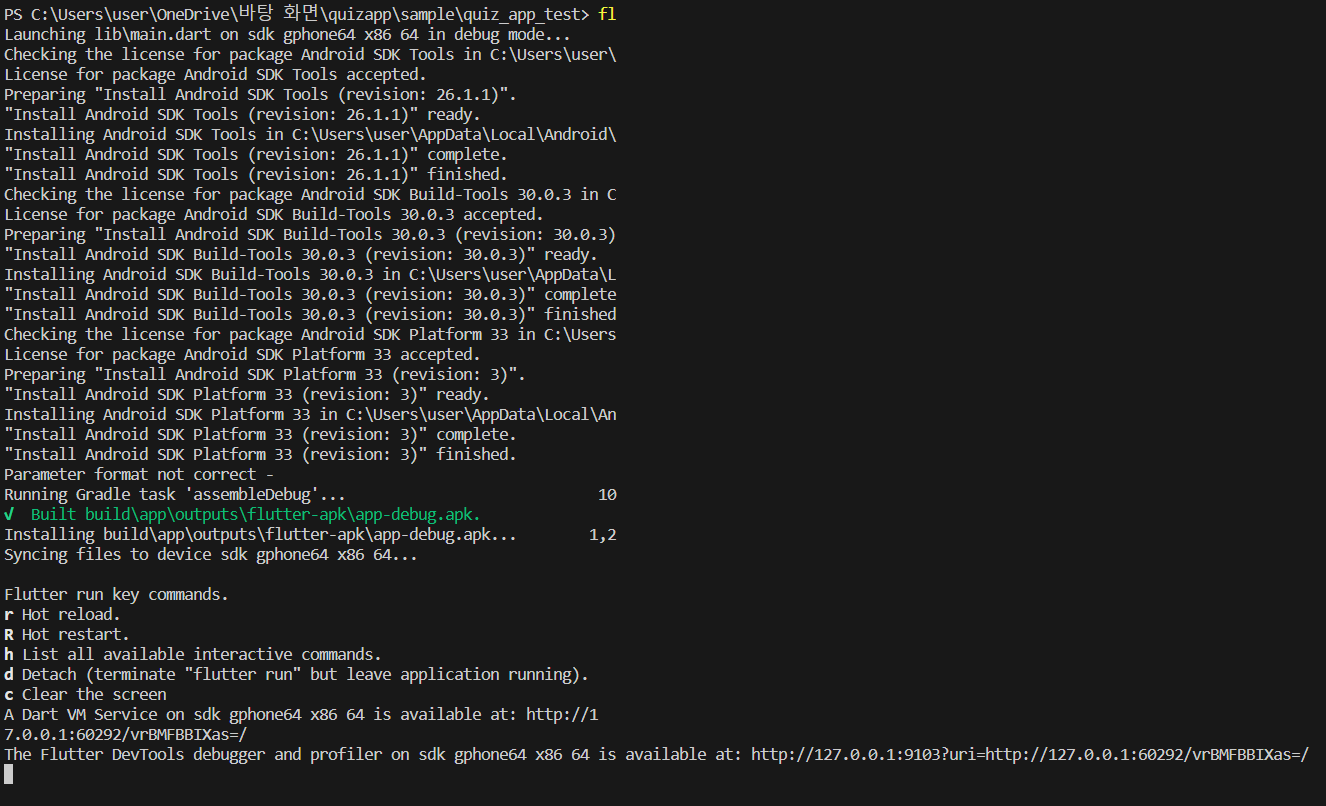
성공.


